How to Build a Backyard Putting Green in Michigan
Building a backyard putting green requires five key components: proper excavation, a compacted drainage stone base, precision grading for true ball roll, specialty nylon putting turf, and a framed edge system that holds everything together. Skip any one of these and you end up with a surface that puddles, shifts, or sends every putt offline.
This guide walks through the full process of building a putting green in Michigan -- from initial planning through finished installation -- so you understand what the project involves, what it costs, and why certain steps matter more in our climate than in warmer regions.
Planning Your Backyard Putting Green
Choosing the Right Location
The best spot for a putting green is a relatively flat area with good natural drainage. Avoid low spots where water collects after rain. In Michigan, that means paying attention to spring snowmelt patterns -- a spot that stays dry in July might turn into a pond every March.
Full sun is ideal but not required. Synthetic putting turf does not need sunlight to stay green, and shaded areas actually stay cooler in summer. Avoid placing the green directly under large deciduous trees, though. Falling leaves, acorns, and sap create maintenance headaches and can stain the turf surface over time.
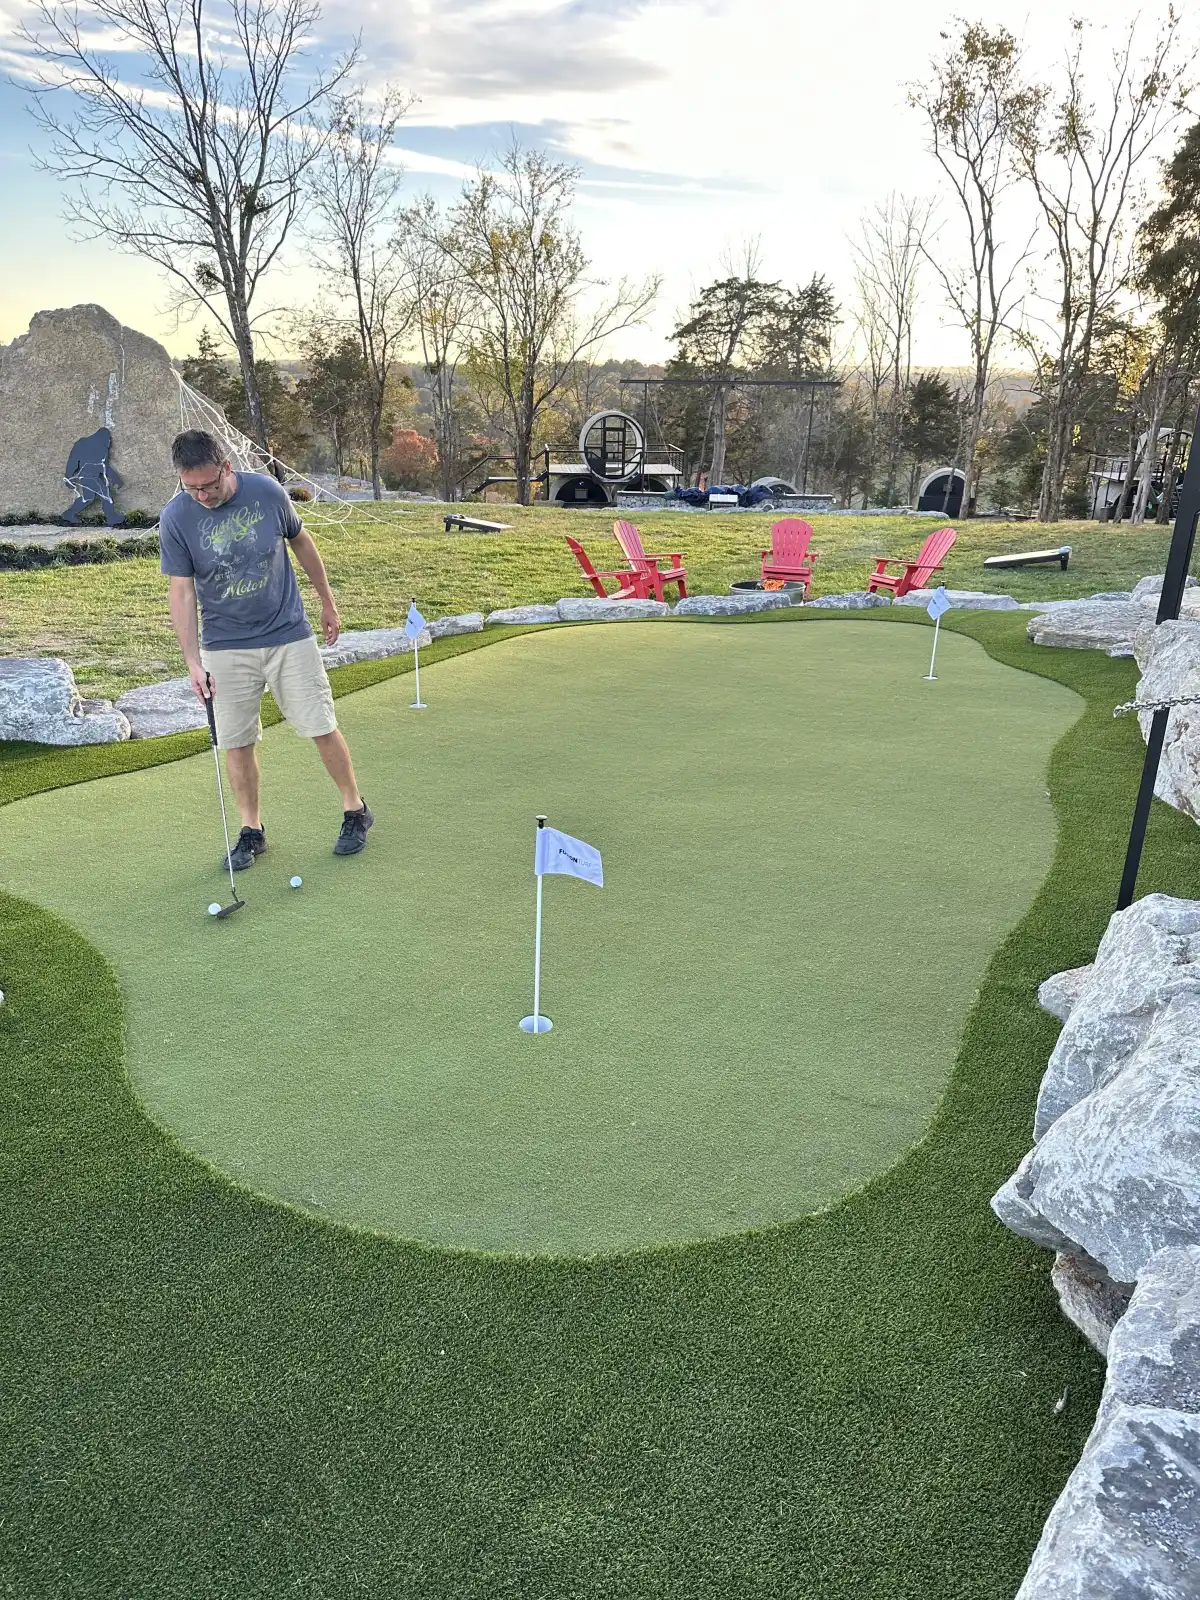
Most residential putting greens range from 300 to 1,000 square feet. A 400-square-foot green gives you room for 3 to 4 cups with enough distance for meaningful putts. A 700-square-foot or larger green can include chipping areas, fringe zones, and varied contours that mimic a real course.
Design Considerations
Putting green design goes beyond just the shape. Here are the decisions that affect both playability and cost:
- Number of cups: Most residential greens have 3 to 6 cups. More cups mean more versatility in practice routines but also more complex grading.
- Contours and breaks: Flat greens are easier to build but less interesting to putt on. Subtle mounds and valleys -- typically 1 to 3 inches of elevation change -- create realistic breaks without making the surface feel artificial.
- Fringe and rough: A border of taller turf (fringe) around the putting surface creates a realistic look and gives you a chipping target. This uses a different turf product than the putting surface itself.
- Chipping area: If you want to practice short game shots onto the green, plan a turf or natural grass approach area next to one edge.
- Lighting: Low-voltage landscape lighting around the green extends your practice time into Michigan's shorter fall and winter evenings.
The 6-Step Installation Process
Step 1: Excavation
The existing soil, grass, and organic material must be removed to a depth of 4 to 6 inches across the entire green area. This creates room for the drainage base and ensures the finished surface sits at or slightly above the surrounding grade level.
In Michigan, excavation depth depends partly on your soil type. Clay-heavy soils common in the Grand Rapids, Lansing, and Detroit metro areas drain poorly and may need 6 inches of base depth. Sandy soils found along the Lake Michigan shoreline from Muskegon to Traverse City drain naturally and can work with a shallower base.
Step 2: Drainage Stone Base
This is the most important step in the entire build. A compacted layer of drainage stone -- typically Class II road base or crushed limestone -- goes down first. This layer serves three critical purposes in Michigan:
- Drainage: Water from rain and snowmelt passes through the stone and away from the turf surface. Without it, water sits under the turf, creates odors, and breeds mold.
- Frost protection: Michigan's freeze-thaw cycles are brutal. Ground that freezes and thaws repeatedly causes heaving -- the surface buckles and shifts. A proper stone base absorbs these forces without transmitting them to the turf surface.
- Stability: Compacted stone does not settle or shift the way raw soil does. Your green stays flat and true year after year.
The stone base is compacted with a plate compactor in multiple lifts (layers), each watered and compacted separately. Cutting corners here -- using too little stone, skipping compaction, or using the wrong aggregate type -- is the number one cause of putting green failure in Michigan.
Step 3: Precision Grading
Grading a putting green is different from grading a lawn. The surface must be smooth enough for a golf ball to roll predictably, which means tolerances measured in fractions of an inch. Any bump, dip, or inconsistency in the base shows through the thin putting turf and affects ball roll.
A fine layer of decomposed granite or crusher fines goes on top of the drainage stone. This is screeded (leveled with a straight edge) to create the final surface contours -- the breaks, mounds, and slopes that make the green interesting to putt on. This step typically takes as long as all other steps combined because it requires constant checking with levels and test rolls.
Step 4: Edge System Installation
Before the turf goes down, a perimeter edge system is installed around the entire green. At Great Lakes Synthetic Turf, we use a framed edge system with solid perimeter boards secured by 2-inch screws with built-in washers. This holds the turf taut, prevents edge creep, and creates a clean finished look.
Plastic landscape edging is cheaper but flexes in freezing temperatures and pulls away from the turf within one to two Michigan winters. Bender board is better but still not as rigid as a properly framed system. The edge containment is what keeps your green looking tight and professional for years, not just months.
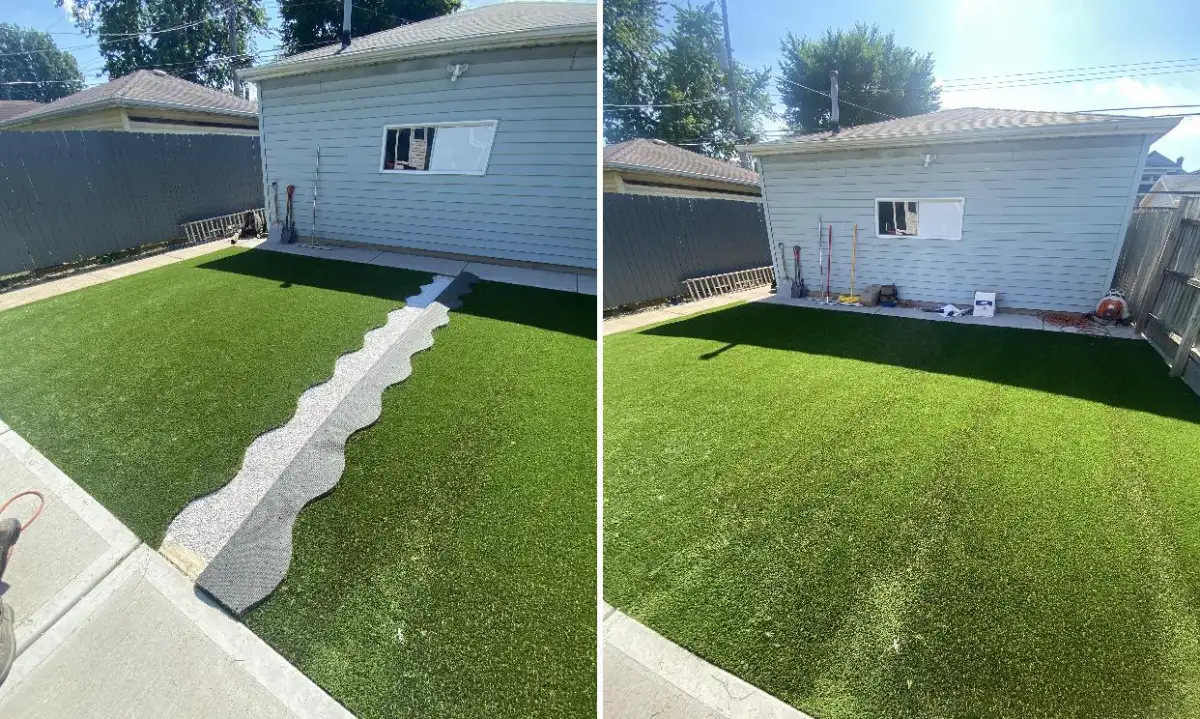
Step 5: Turf Installation
Putting green turf is a specialty product that is fundamentally different from standard landscape turf. It uses short, dense nylon fibers (typically 0.5 inches) that provide a consistent ball roll speed. The turf is rolled out, cut to shape, and secured with landscape spikes around the perimeter and at seams.
Seaming is where craftsmanship matters most. Putting green seams must be invisible -- any visible seam line will deflect putts. Each seam is glued with outdoor adhesive on seaming tape, then the fibers are carefully blended by hand so the pile direction matches across the joint.
If your design includes fringe or rough areas, those use a separate turf product with a taller pile height (1 to 1.75 inches). The transition between putting surface and fringe needs to be clean and tight.
Step 6: Infill and Final Grooming
Silica sand infill is spread across the putting surface and brushed into the fibers. The infill adds weight to hold the turf in place, supports the fibers so they stand upright, and affects the speed of the green. More infill creates a slower surface; less infill creates a faster one. A typical residential green targets a stimp speed of 9 to 11, which matches a well-maintained country club green.
After infill application, the entire surface is power-brushed to distribute the sand evenly and bring the fibers upright. Cup locations are cut, cups and flags are installed, and the green gets its first test putts.
DIY vs Professional Installation
The rising interest in DIY putting greens is understandable -- building your own green sounds like a satisfying project. Here is an honest comparison:
What DIY Can Handle
If you have experience with landscaping, access to a plate compactor, and are comfortable with precision grading work, a small flat green (under 200 square feet) with no contours is within reach. The materials are available to purchase separately, and there are kits that include pre-cut turf, cups, and basic instructions.
Where DIY Falls Short
The main challenges are grading precision, seaming quality, and base compaction. Professional installers use laser levels and string lines to achieve sub-quarter-inch tolerances across the entire surface. DIY builders typically end up with subtle dips and high spots that become obvious once you start putting.
Seaming is the other major skill gap. Putting green seams require specific adhesive products, correct drying time management, and the hand technique to blend fibers invisibly. A visible seam on a landscape turf lawn is cosmetic. A visible seam on a putting green affects every putt that crosses it.
In Michigan specifically, base preparation is more demanding than in southern climates. Our freeze-thaw cycles, high water tables, and clay soils mean the drainage base needs to be engineered correctly from the start. A base that works fine in Arizona will fail here within two winters.
Cost Comparison
DIY materials for a 500-square-foot putting green typically run $3,000 to $5,000. Professional installation for the same size green costs $7,000 to $10,000. The difference is labor, equipment, and expertise -- particularly in base preparation and precision grading. See our full cost breakdown for more detail on where installation dollars go.
A poorly built green that needs to be torn out and rebuilt costs more than doing it right the first time. The base work cannot be corrected after the turf is down -- if the grading is wrong, the entire installation must be removed to fix it.
Michigan Climate Considerations
Building a putting green in Michigan is different from building one in California or Florida. Three climate factors drive these differences:
Freeze-thaw cycles: Michigan goes through 80 to 100 freeze-thaw cycles per winter. Each cycle pushes moisture up through the soil, which is why proper drainage below the stone base is essential. Without it, ice lenses form under the turf and create bumps that ruin the putting surface.
Snow load: Snow sitting on the green for weeks at a time is not a problem for quality synthetic turf -- it compresses the fibers temporarily but they spring back once the snow melts. The real concern is the water volume during spring melt. A 500-square-foot green can receive 200+ gallons of water in a single melt event, and all of it needs to drain through the base without pooling.
UV exposure: Michigan summers deliver strong UV despite our northern latitude. American-made nylon putting turf includes UV stabilizers that prevent fading and fiber degradation. Imported products often lack adequate UV protection and can become brittle after three to four summers of direct sun exposure.
Maintenance Requirements
A properly installed putting green requires very little maintenance:
- Weekly: Blow off leaves and debris with a leaf blower. Takes 5 minutes.
- Monthly: Brush the surface with a stiff-bristled broom to redistribute infill and keep fibers upright.
- Seasonally: Rinse the surface with a garden hose to flush dust and pollen. In fall, stay on top of leaf removal to prevent staining.
- Annually: Check infill levels and add more if needed. Inspect edges for any separation. A professional top-up and deep grooming every 2 to 3 years keeps the surface playing like new.
There is no mowing, watering, fertilizing, or aerating. The green looks the same in January as it does in July -- which means you can practice your putting game year-round as long as you can clear the snow off.
Common Putting Green Mistakes to Avoid
After years of building and repairing putting greens across Michigan, we see the same problems come up repeatedly. Most stem from shortcuts during installation that seem minor at the time but create lasting performance issues.
Using landscape turf instead of putting turf. Standard artificial grass with a 1.5-inch pile height is designed for lawns, not golf. The fibers are too tall and too soft to produce consistent ball roll. A putt on landscape turf wobbles and decelerates unpredictably. Putting-specific nylon turf has a short, dense pile that the ball glides across smoothly, the same way it would on bent grass at a course.
Skipping contour design. A completely flat green is easier and cheaper to build, but it offers limited practice value. Golf is about reading breaks, judging slope, and controlling speed on inclines. Even subtle elevation changes of 1 to 2 inches across the green surface give you realistic putting situations that transfer directly to your course game. The contour design phase is where your green becomes a training tool rather than a novelty.
Insufficient base depth for Michigan conditions. Installers from warmer climates sometimes recommend 2 to 3 inches of base stone. In Michigan, that is not enough to protect against freeze-thaw heaving. A 4- to 6-inch compacted drainage stone base is the standard here. The additional stone costs a few hundred dollars more on a typical project, but it means the difference between a green that plays true for 15 years and one that develops bumps after two winters.
Poor seam placement. Every putting green has at least one seam where turf panels meet. Experienced installers plan seam locations to fall in areas where putts are least likely to cross, typically near the perimeter or along natural contour lines. A seam placed across a primary putting line will deflect balls noticeably, no matter how well it is glued. Design and layout planning before cutting any turf prevents this problem entirely.
Neglecting the perimeter edge system. Without a rigid containment border, turf edges curl up over time as the ground shifts through seasonal cycles. Plastic edging flexes and separates. Aluminum edging holds better but can warp. A framed perimeter board system with 2-inch screws and built-in washers provides the structural rigidity that Michigan's freeze-thaw cycles demand. This is especially important on putting greens because even slight edge movement changes the surface tension and affects ball roll near the perimeter cups.
Indoor Putting Green Options
For golfers who want to practice even when the backyard green is buried under a foot of snow, an indoor putting green is a practical complement. Basement putting surfaces range from simple roll-out mats to professionally installed greens with contoured sub-floors that replicate outdoor green performance.
A dedicated indoor putting space in a Michigan basement typically requires 100 to 300 square feet. The installation process is simpler than an outdoor green because there are no drainage or freeze-thaw concerns, but the turf product and contour work are identical. Stimpmeter speeds match outdoor surfaces, so your practice translates directly to your backyard green and the course. Indoor greens also pair well with golf simulators, creating a complete off-season practice facility without leaving your home.
Ready to Build Your Putting Green?
Whether you are considering a small practice green or a full backyard putting complex with chipping areas and fringe, the process starts with understanding your site conditions. We do a free on-site consultation where we assess your space, discuss your design goals, and walk you through exactly what the installation will involve.
Every putting green we build uses a proper drainage stone base, framed edge system, American-made nylon turf, and precision grading -- the same approach whether it is a 300-square-foot practice green or a 1,500-square-foot entertainment feature. We serve all of Michigan from our White Cloud headquarters.